


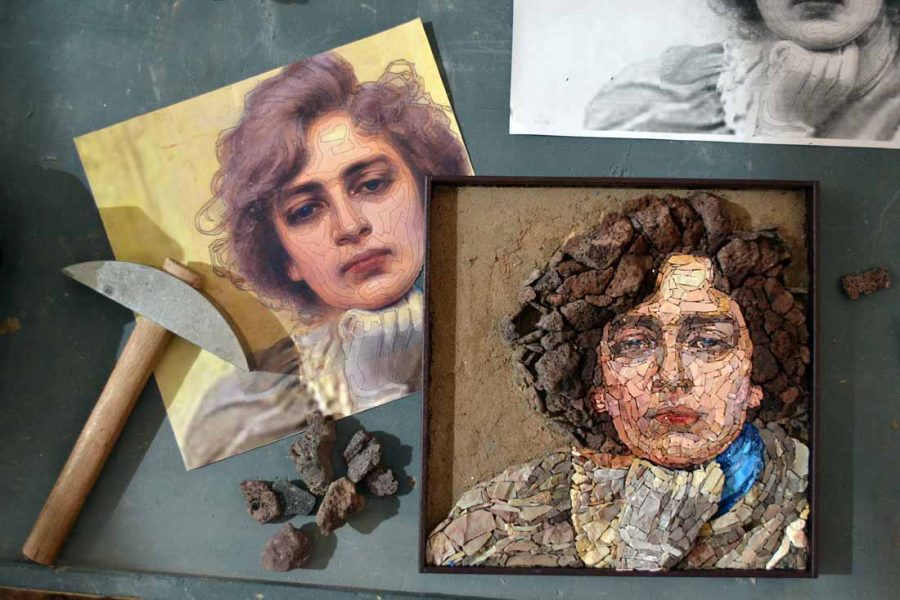


Last week I finally finished my portrait. To work on it was really fun because each part of the original work had to be interpreted in a different way: different materials, new textures, new color mixing. And everything we have learned in the second year could be put in practice in one personal work.
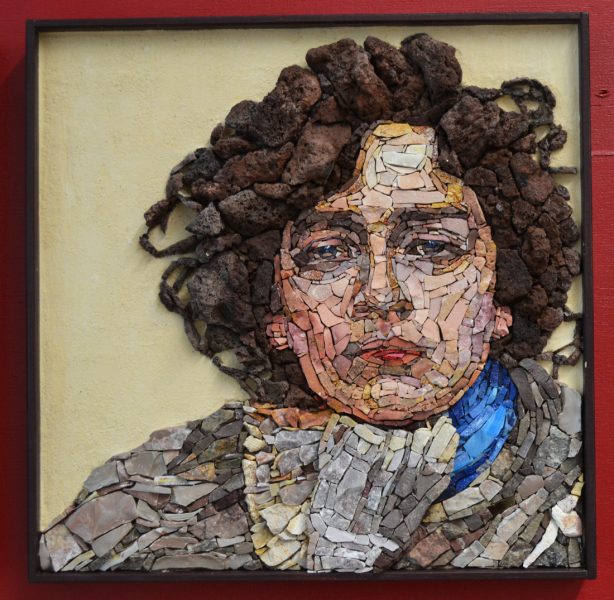
I love natural materials such as marble and stone. Therefore, I used smalts only for the iris and the scarf – both blue tones that are hard to find in marble and in the original work in my opinion also play a prominent role, deserving reflections that venetian glass offers. For the rose skin colors, I added some pieces of an old Bisazza production whose outer less shiny side we use with marbles. And also the dress has some pieces of glass that just fit too well with structure and colors.
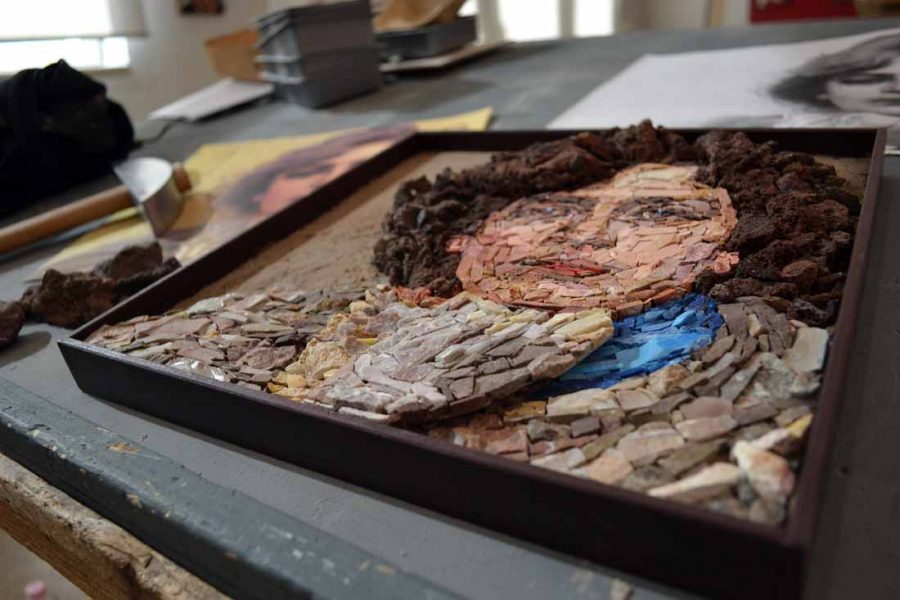
As in school we have great opportunities to experiment, my work approach was not the most traditional: I have worked with irregularly shaped tesserae and also played with leaving a bit more joint here and there. Also, like for the Musiva work, I used different levels to create a certain depth: The glove is raised a few millimeters and the hair is made of volcanic stone, which I had bought for my final mosaic work and already had brought to school. The longer I looked at the red-brownish material in front of me, the more I felt to use it to create the volume of curls. It took me three attempts to create a natural flow of hear with the lightweight and porous stone I left in its natural form. After a result that seemed more Rasta than curly and one that was a bit flat, I like it now.
It really feels like magic when tesserae made of stone begin to form the eyes, the nose, the mouth, and finally the face gets its shape. A piece that is cut in a wrong shape or has the wrong color can change the entire look of a face or the form of a cheek. That is why it is important to follow exactly the andamenti and to implement the correct color contrasts – especially in areas such as the eyes, nose and mouth.
I could now go on making mosaic portraits for an entire year. But in the next academic year starting in September we already start with contemporary work, and I am looking forward to it. In our final mosaic work we are already half way with, we already take a first step to that direction. Friday next week is the last day of school. I’ll let you know how the exam week has ended!


Lovely work Miriam, portraits are so difficult I think, it is something I would need to have some time to practice. I am always in awe of mosaic artists who make all the flesh tones look 3 dimensional and the nose look real, as you and the other students have achieved so beautifully. I especially love the hair made from the volcanic rock. It looks almost like wool. Thanks for sharing!
Thank you Kate! Yes, in fact making a portrait really requires a lot of practice, but I am sure you can make that, too. Wool, yes that’s true, it really looks a bit like that :-) The lava stone makes me think of so many things, I have fallen in love with that material!
Great Job Miriam ! I love the way you used what looks like lava rocks for the hair. Amazing !
Thank you Frederic! Yes, it is lava and I really enjoy working with that stone!
What fabulous work. I really love the detail and intricacy of the piece. It is incredibly lifelike. Great Blog, really enjoyed learning about the process and stages involved. Look forward to seeing more of your work. Rosanna
Hey Rosanna, thank you! And so nice to hear that you like this blog and can learn something for yourself from my posts! Best wishes, Miriam
Dear Miriam,
I have seen and admired this work for a long time and was frustrated because it’s artist was never noted! I am delighted to see your name on it. Bravo! The work is excellent. I too, am struggling to learn to mosaic portraits. I notice in one of your work in progress pix it appears you are working on a plastic background. Is that contact paper (sticky on the upside?) And how do you then attach that to your substrate? I’d be very grateful for your advice. Thanks.
buy cialis online 20mg Department of Oncology Pathology, Karolinska Insitutet, Solna, Sweden